Throughout the academic year, SGA and other Wagner groups hold elections for various offices and awards. Here are guidelines for how to secure the appropriate resources for electronic voting:
1. If the voting process will require laptops or other media to be set up for student use, make sure to reserve the appropriate resources through the Media Services request form. Media requests require at least 48 hours notice.
2. SGA or the responsible office should build the voting form on their own website.
How to Create a Ballot
Step One: Open up your WordPress dashboard, by logging in with your All Access login at https://www.wagner.edu/admin
Step Two: Click on the "PAGES" tab on your menu to the left, and then click "ADD NEW."

Step Three: Change the template of the page to either "C- Vote: SGA Senate Election" or "C-Vote: Student Only Voting." The difference between the two is that the SGA Senate Election template only allows freshmen to vote for freshmen, sophomores to vote for sophomores, etc. The Student Only Voting template allows only currently enrolled students to vote, but they are allowed to vote for any student class. 
Step Four: After typing in a description about your poll, fill in the dates and times you'd like the poll to be open.

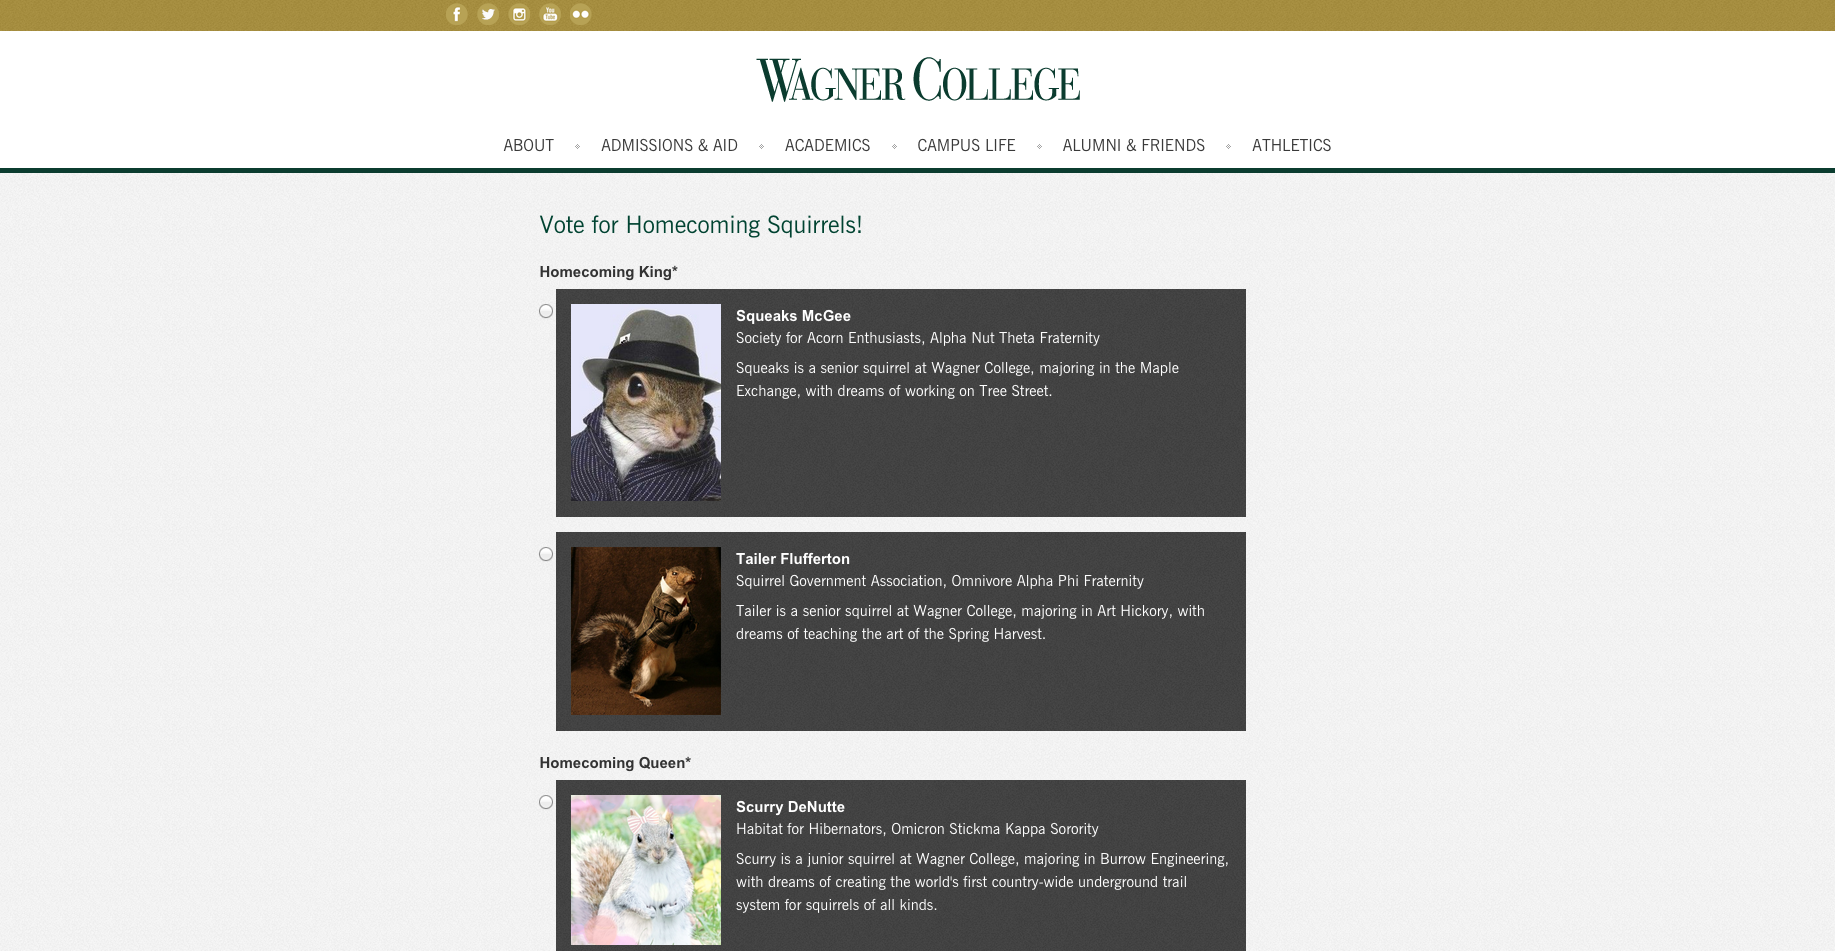
Step Five: Click the blue, "Add Candidates" button on the right hand side of your page, and select which category you'd like to start with. For this example, we're working with Homecoming King and Queen.

Step Six: This is what your page should look like. Here you can add an image of your candidate, fill in his name, organizations he is affiliated with, and a bio.

Step Seven: When you're finished filling in the information for one candidate, it should look something like this. You can add another candidate in the same category by clicking "Add Candidate for Homecoming King."

Step Eight: This is what your page should look like if you have added two candidates for one category.

Step Nine: If you'd like to move candidates around, you can click on the number seen to your left, and drag the candidate's profile box to where you'd like it (i.e. Tailer before Squeaks). You can also delete a candidate from the category by clicking the minus sign to the right of the candidate's profile, or add a candidate in between the two by clicking the plus sign to the right of the candidate's profile.

Step Ten: To add another category, say Homecoming Queen, click on the "ADD CANDIDATES" blue button below the first blue button.

Step Eleven: Follow the same process for the new category of candidates, and you should have a page looking similar to this.

Step Twelve: Click on the "UPDATE" button towards the top right of your screen, as you would any page you were editing. You can view your page on the "view page" button towards the top center of your screen, next to your page's URL. Your final product should look something like this. PLEASE NOTE: You will not be able to view the voting page until the poll is open (according to the dates you set in step four). You can edit the date so that it is visible to you for a brief time, to ensure the page looks the way you'd like it to, and then change the date back to when you'd like the poll open to students.

Users can view the poll results on their WordPress Dashboard. You must have permissions to be able to view the results.
